Granite Countertop

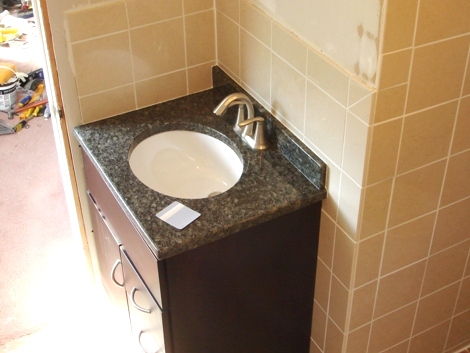
The guy came from Westwood Tile and Stone  today to install the granite countertop for the vanity.   The vanity looks great now, and the guy did an excellent job installing it.  However he was pretty much the only part of our dealings with Westwood that I was particularly pleased with.  Although there weren’t any huge problems, there were a bunch of minor issues that would prevent me from using them again.   In addition to the granite, we also bought the tile from Westwood.  On our first trip to the store, we worked with a very nice gentleman who was very helpful and informative.  However when we went back the second time to look at the granite, he wasn’t there so we worked with another saleswoman, who was much less helpful.   We spent alot of time being concerned that they weren’t gonna get the granite to be the right size.  It wasn’t until the next time that she mentioned that they would come out and make a template.

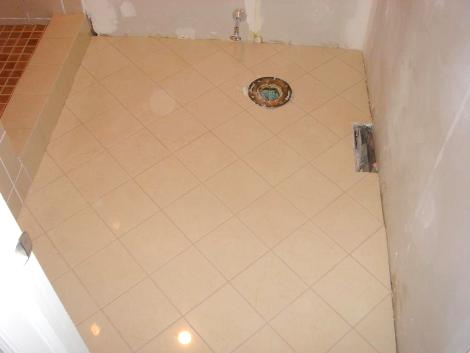
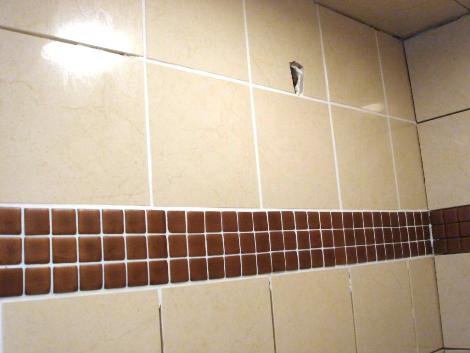
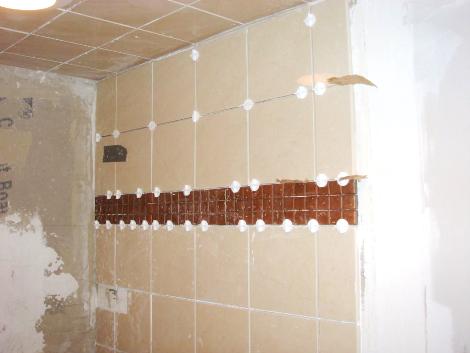
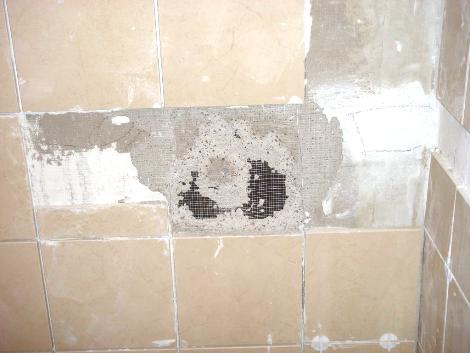
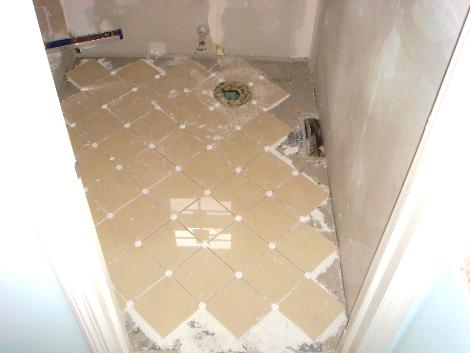
When we went the third time to make the final decisions on the tile, and to pay for everything, we once again got a different saleswoman.  We picked out the tile we wanted, and also the trim tile.  She never mentioned that the trim tile was a eight of an inch thicker than the field tile.  (Fortunately I was able to put a thinner coat of thin-set on and it looks alright)  When the tile came in we never got a call about it, I had to call and find out that it was waiting for us.  Lastly with the granite, the holes for the faucet were not countersunk, so the fittings for the faucet didn’t fit through. 

 It all ended up working out ok,  and perhaps most of the stuff is things I should have already known.  However the tile and granite cost a small fortune, and I felt that for that price we should have gotten a little better service. 

Finished up grouting

groutfloor.JPG

Been extra busy this week, trying to get ready for the granite counter-top to arrive on Friday.  We  finished up most of the grouting today.  On the floor we choose to use a ‘latte’ colored Spectralock grout.   We were quite scared when the grout first went it, as it looked very light, and rather pink.  However it darkened as it dried, and although I think it might be a bit better if it was a shader darker still, I’m still quite happy with how it looks.   For the floor we mixed up two mini-units of grout, and then put half in the freezer while doing the first half.   After I finished the first half, which was getting difficult to work with, I pulled the second out and it was still nice and soft.  After finishing up, I took the remaining lump and put that back into the freezer, in case I found any spots we missed.

Grouting

grouted.JPG

With the tile all laid, we started doing the grout.  We’re using an epoxy grout, specifically, Laticrete SpectraLock Grout.   I was quite nervous to do the grouting, as I’d never done it before, and really didn’t want to mess up our wonderful tile.   After reading about the SpectraLock all around the web (especially over at the John Bridge Tile Forums) it seemed like the best choice and sounded pretty easy to install.   It went  up pretty easily, all though it was a very time consuming process.  I pretty much followed the instructions, although I used a micro-fiber cloth to clean up the grout haze.   I did end up dropping alot on the floor while doing the walls, however I had laid down some clean cardboard, so it was easy to salvage what had fell.  I suspect someone with more experience could do it faster, however you still need to go back twice to clean it up so you need to leave a good chunk of time to do it.

I’ve done two of the ‘mini-units’ they sell at Lowes so far.  I was very happy to find that you can’t see the joints between each day at all.  I’m a bit disappointed with the coverage, although its pretty much in-line with whats on the package.  I originally bought one for the walls and one for the floor,  but its going to end up taking five for the walls and two for the floor.  Not to big a deal, but the stuff is like 25 bucks a unit.  The end result however, looks fantastic.

Tiling is done!

tilefinished.JPG

Well after about a month or so of working on it, we’ve finally finished all the tiling.  I severely underestimated just how long doing all the tiling would take.  Mostly I didn’t realize how irritating cutting the tiles would be.  Laying the tiles in the middle of the walls and floors is really quite simple, however properly measuring, and then properly cutting the tiles for the edges was both difficult and tedious.  Complicate this with the problems I had with my tile saw, and it ended up taking alot longer than I would have liked.  Regardless, the tiles are all in now, and I’m quite happy with how they look.  There are a few that aren’t as flat as I would like, and a few that aren’t perfectly even.  But for our first time laying tile I think we did a wonderful job.

Border Tile

border.JPG

The copper border tiles we ordered finally came in a few weeks ago.  To accent the main tiles we decided to put a 3″ border of tiles around the shower.  We looked around and picked out the Sonoma Tilemakers MoSuprema 1×1 tiles in Heritage Copper.  We really liked the look of these tiles,  the glaze is actually copper and it looks great next to the gloss of the main tiles.  The tiles were extremely expensive though, about $60 a square foot.  Fortunately we only needed three sheets, so it wasn’t to big a deal. 

I was rather disappointed with the tiles when they arrived.  It seems that these days, handmade is just an excuse for poor quality.  On a handful of the tiles, the glaze looked poorly mixed and the tiles really looked quite bad.  A few others looked like they had gotten big nicks in them before they were glazed, and then a significant number of them had ledges on the bottom, such that they wouldn’t lie flat.   I was fortunate to notice the first two problems before installing them, and pick those out.  The last one however made installation quite difficult, and has resulted in some unevenness that I’m not happy about.  The back of the tiles were covered in two layers of paper mesh, which in some spots covered almost all of the back of the tile, and I was worried that they wouldn’t adhere well.  Fortunately after tediously removing one layer, they seem to be ok.   Despite all these problems they do look incredible  and really add some character to the bathroom.

Tile Removal

tile-removal.JPG

We’re slowly making progress with the tiling.  We’ve got 3/4 or so of the tile up now, however yesterday I realized that two tiles had to come down.  I was a bit over anxious and didn’t realize that the corner shelves we are installing will require not just the closest tile to the corner to be cut, but also the one next to it.   Without a way to cut the tile on the wall, I was forced to remove the tile and put a new one up.  The good news is that the tiles are adhering to the Durock extremely well.  The bad news is that the tiles are adhering to the Durock really well :-/.  I first tried chiseling off the tile, and ended up taking most of the cement board with it.  On the second tile I tried breaking up the tile and trying to remove small pieces at a time.  This left more of the Durock in place, however it also broke it up so that after removing the tile I had to cut out the damaged pieces of Durock.   I plan on patching the hole with a few coats of thinset and fiberglass tape, and hopefully this will create a stable surface for the replacement tile.

Tile Floor

tilefloor.JPG

This weekend I started laying the tile for the floor of the bathroom.  I’d been on hold for a few days waiting for a new blade for my tile saw.  The tile looks great, and I really like the diamond pattern, although it is a bit more difficult to put down in this fashion.  I’ve also found that I’m getting better at laying the tile, and that laying tile on the floor is significantly easier than laying it on walls.  I’ve also found that instead of mixing the thin-set in a big square-ish bin thing (Picture), if I mix it in a small 5lb joint-compound bucket, I can use the drill mixer to quickly and easily mix up a batch.  While this probably wouldn’t be a big enough batch for a more skilled tile setter, for me its perfect.  This small bucket is much easier to move around, and cleanign it up takes only a minute as opposed to the lengthy and messy process of cleaning the other bin.

Felker FTS-50

saw.JPG

When I started planning our bathroom remodel, I began looking into different methods for cutting tile.  There are a slew of choices, Tile snappers, wet saws, jig saws with carbide blades, or nippers.    I looked at Lowes and saw that they had some decent looking saws, and picked out a mid-range one, the Felker FTS-50.  Since I was only doing a small bathroom I figured this would be just what I needed.   I’d never used a wet saw, so I tried it out and it seemed to cut well and besides for being incredibly loud, I was pretty happy.  The saw came with a crappy plastic fence, a little plastic thing that was meant to help guide the tiles if you cut them at an angle.  I tried to use these at first, but found them to be causing more problems than they solved, and ended up just drawing a line on the tile and cutting them free hand. 

Cutting the tiles in this manner worked well, however after awhile I noticed the cuts where chipping alot.  I assumed that since I was using a porcelain tile, the blade had worn out.   I figured the blade that came with the saw wasn’t of the highest quality, and that I could just buy a replacement blade and all would be well.  However this is where things go south.  I went to Lowes, and found, that while they have 4″, 4.5″ and 7″ Diamond blades, they don’t have a 5″ blade.  I thought about getting a smaller blade, but if the blade wasn’t big enough then it wouldn’t touch the water.  Well I assumed they were just out of stock, so figuring you can buy anything online, I turned to the web.  After a ton of searching I realized that 5″ tile saws are not very common, in fact this Felker may be the only one.   Therefore getting a blade was not easy.  I asked at one store for a porcelain blade and was told that the FTS-50 was not cut out for porcelain tile, and that the motor would surely burn up if I tried.  Well a bit late for that, wish someone had told me that before I bought it.

At this point I sent an e-mail to Felker, asking where I could get a replacement, and was told to check local tile stores.  I replied saying that I had, and they didn’t carry 5″ blades, but never heard anything back.  After alot of searching I finally managed to get a new blade from the nice folks at PremiumBlade.com .  It wasn’t anything fancy, but it was pretty cheap, and I did notice that it had alot more diamonds in it than the original.  I quickly installed this and made a few trial cuts.  To my surprise, the tile still chipped and the cuts weren’t clean.  As I was playing around with it, trying to figure out why, I noticed that the blade seemed to wobble.  It was hard to tell when it was moving, but easy to see as the blade came to a stop.  After re-installing the blade a few times, a came to the conclusion that the shaft was actually bent.  At this point I went back and looked at some of the tiles I cut earlier, and noticed they none of the cuts looked very smooth, and they all had alot of chipping.  So I assume that I just never noticed it before.  So at this point, I’m going to just have to live with the poor quality of the saw.   Its to late at this point to return it, and I certainly don’t want to waste another $100 on a better saw. 

If anyone else is thinking of buying a Wet Saw, I would highly recommend not getting the FTS-50.  Felker Saws have a good reputation, however regardless of how good the saw is, getting one that you can’t get a replacement blade for is just silly.  In fact, I’m amazed that Lowes even sells this saw.

Bathroom Floor

cementfloor.JPG

The bathroom floor is going to be tiled with the same tiles that we are using on the walls in the shower.  The floor of the bathroom was originally done with a thick-mud bed over a wire lath.  Since I’m fairly certain I didn’t have the skill to do that, I’ve done what is much more common these days, and that is to lay down some Durock over some plywood.  This gives a nice flat base without alot of skill required.  To keep everything in place, I first screwed down the plywood to the plank sub-floor (trying to get the screws into the studs as well).  Then I put a coat of thin-set over the plywood, and laid the Durock on top of that.  The picture above is just a test fit, so there is no thin-set in that (but check out the gallery for those pics).  I once again used my jigsaw with an old blade to cut the Durock, which works wonderfully, if a bit messy.  Cutting out the part for the toilet drain was a bit tricky, as I didn’t want to just cut out to big a section for fear it would destabilize it.  After test fitting the pieces and laying the thin-set I then laid the sheets down, and slid them around a bit to get them to bed into the thin-set well.  Then I screwed them down using Rock-On brand cement board screws, which work wonderfully for securing the Durock.  Lastly I used some fiberglass tape, and some more thin-set to secure the seams.

Sheetrock Part 2!

sheetrock.JPG

On Friday I put up some more Sheetrock.  I was originally planning on using bigger pieces, however due to the small size of the bathroom it was impossible to get the large pieces of Sheetrock into the room.  I also forgot that joints should be on the studs, and had to put in a couple of patches to keep the edges from moving.  Still I did manage to get the plumbing for the toilet in, and even got the hole in the right place.  Which is particularly surprising considering just how poor my Sheetrock cutting skills are.  Out of 7 or 8 pieces in the bathroom I didn’t get a single one cut right the first time.  I’ve also learned that with ‘rock’ products, be it Sheetrock or Durock, you should never try to force it in, as it will just end up cracking.  My general problem seems to be that I cut the pieces to close to the actual measurements.  Then when the sides aren’t square, or my cuts are a bit off it doesn’t fit.  I need to learn to cut them 1/2″ or so small and then just spackle over the gap.