Primer!

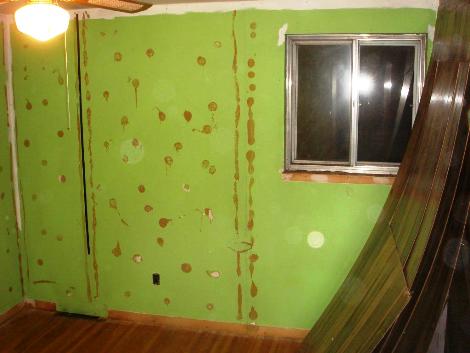
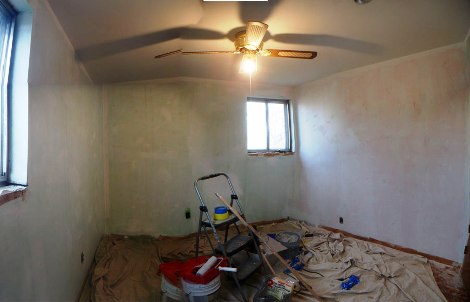
After days of sanding and prepping the walls its finally time to start painting. The first step is of course a good coat of primer. Its possible that I could have gotten away with just two top coats, but with the bright green paint, as well as all the spackel I had put up I wasn’t sure. Besides putting up a coat of primer is quite easy and doesn’t take much time.

The picture is actually a montage of about 15 shots that I took with my little Sony T9, since it doesn’t have a wide enough view to get much of the room in one shot. It turned out pretty well I think.

Repairing the Walls

With all the paneling removed the fun part really begins. See in addition to using nails the folks who installed the paneling also used construction adhesive. This kept the center of the paneling stuck to the wall. Unfortunately when the paneling is removed, msot of the adhesive stays stuck to the wall. Since I didn’t want to replace all of the drywall that meant that the adhesive needed to be sanded off. Before I did that I used a block plane to scrape off some of the adhesive, but I couldn’t get it all, and that meant that I spent many house using my random orbital sander, with a 50 grit pad to take down the rest of the adhesive. My wife was nice enough to help out and do some sections, but it still took forever.

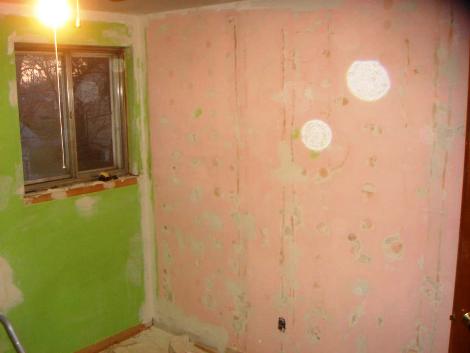
Once the adhesive was all gone, the next part was to patch up the walls. Some spots got sanded down a bit to much, and in a lot of spots the adhesive actually pulled the paper off the Sheetrock. There were also some large holes in two places, that required a new piece of Sheetrock be patched in. All of this meant another few days using lots of joint compound, and sanding some more. Ohh and don’t you just love the green and pink walls?

Paneling Removal

Removing wood paneling seems quite simple at first.  You just take a pry bar and pop it off the walls.  The glue doesn’t hold very well and the nails are small and easily pull through the wood.  Unfortunately since this was the 2nd room I was doing (the first was Jess’s office), I knew that getting the paneling off is the easiest part.   Once its off, you have to scrape and sand the glue off of the wall, and then spackel up all the holes.  Disposal of the paneling is also a pain, since the 4×8 sheets don’t easily fit out the door,  and the garbage men won’t take them.   To do that I stacked the sheets up, took my trusty reciprocating saw, and cut them into pieces small enough to fit in a box that I could put out at the curb.  Wasn’t overly difficult but it made a huge mess and the wood splinters like crazy.

Guest Room

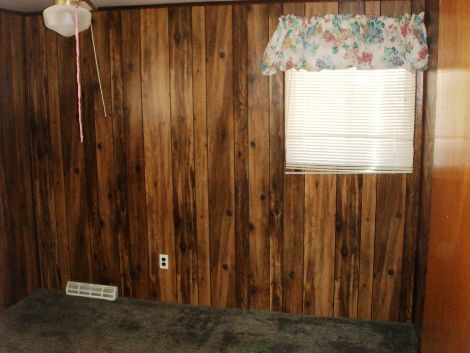
This isn’t really the best picture, but its the only one I had of the guest room before we ripped the carpeting out. When we moved in the guest room was walled with wood paneling and had a very dark grey carpet on the floor. The carpet was pretty beat and underneath there were some nice hardwood floors in decent shape. So right away we decided to rip up the carpet and chuck it. We then moved into the room and used it as our bedroom while we were redoing the master bathroom. Once that was finished and the room was vacated we tried to figure out what to do to the room. The problem is that its a very small room, and the wood paneling is very dark (as well as being quite dated). The room does have two windows but they aren’t very big, and therefore the room always feels like a cave. So clearly the paneling has to go. With the other big projects coming up we can’t afford to replace the windows right now, so they’ll have to stay. Also since we’ll be takign down the paneling we’ll need to replace all of the molding.

As an aside I actually started ripping down the paneling in December, but never got around to posting it.

Workshop Stage 1 Complete!

My goal this go round with the shop was to get it cleaned up, and usable. I’m all finished with that now. I’ve got it all cleaned up, rearranged and all the tools hung up. I got the big tools all arranged and setup. The table saw (in the foreground) came from my grandfather, and while its about 50 years old it still works great. It could use a new blade, but it takes the standard size so thats easy enough to replace. I also did some electrical work, running a 220V line down for the air compressor and the table saw. Since I moved the door I also had to move the light switch, and while I was doing that I also added a whole bunch more outlets (for easy power tool use!) as well as a bunch more lights so that its easy to see what I’m doing. I put a piece of green outdoor carpet stuff that was laying around in front of the bench so that I wouldn’t have to be standing on the cement floor.

At this stage its all usable and it looks good, but there is still a good bit of work to do. I need to run some sort of dust collection system, as well as put up some more shelving. I’ve also got my grandfathers massive old screw collection, its a few hundred old baby food jars full of every sort of screw and nail. Its great to have as it means I won’t ever have to run to Lowes for one more screw. I also would like to get a few more power tools so I can do some real woodworking, perhaps a jointer, planer and a router table. Lastly I’ll need to setup some sort of spray booth. All of this will have to wait until the upcoming family room project is complete though!

Tools on the Peg Board

I went through and put most of my various tools up on the peg board today. Not all of them fit, so I tried to just put the most commonly used ones up. The rest I think I will keep in my tool box for now. I hadn’t realized just how many tools I have. Its amazing how many different ones you need for different tasks. I don’t think I really ahve them arranged very well, I just kinda put them up wherever they would fit. I also need to find a good way to keep all of my drill bits organized.

Peg Board is up!

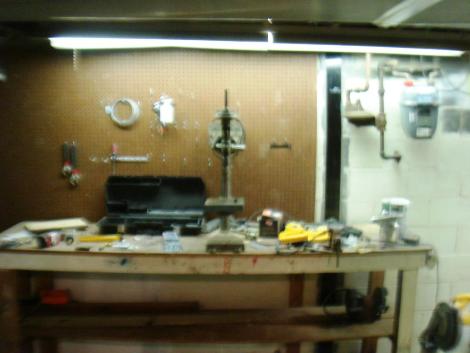
After rearranging everything and cutting the new door, I started putting things back up. The first step was to get the peg-board back on the wall. Peg board is great for arranging all your tools in a nice easy to find area, that doesn’t take up much space. There already was a peg board in the basement, but I took it down when the guy came to reinforce the walls. To put it back up I used some concrete screws and just bolted some 2×4’s to the wall. While expensive these screws worked very well and made for a nice solid backing.

As an aside, a little while ago my 1.5 year old camera decided to call it quits. The Sony DSC-T9 which I was previously quite happy decided it didn’t want to focus anymore (hence the poor focus on this pic). Of course the camera only has a 1-year warranty. This meant that I now had a nice $400 brick instead of a nice little camera. I was able to get it kind of working again by swapping some parts out with one I got on ebay, but still I won’t be buying another Sony any time soon.

Air Compressor

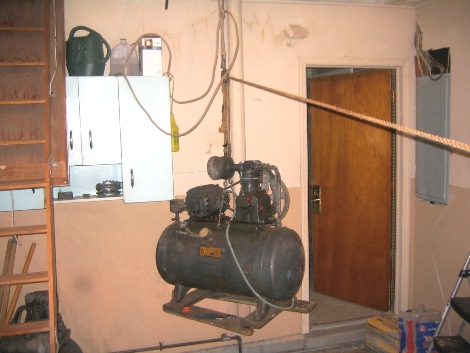
Every good shop needs an air compressor. They are wonderfully useful for all sorts of things, particularly nail guns. My grandfather recently passed away and he had a very well equipped shop. Fortuanly I got to inherit alot of his old tools including his table saw, drill press, and this air compressor. This a big ~25 gallon 2-stage compressor. It’s also quite old, 1934 to be exact. That means two things, first is it doesn’t have a very powerful motor, only 3/4hp (but I could put a bigger one on if I need to) and its heavy, very very heavy. Getting it out of my grandfathers basement and into the truck took four guys and we were all exhausted by the end of it. This was particularly interesting considering my Uncle’s comment that my grandfather had gotten it into the basement all by himself, using a block and tackle.

Well when I got the truck home I was all by myself. Sure I could have called up some friends and had them come over and give me a hand, but where’s the fun in that? So I set to work getting it out by myself. First I slid it onto the table saw stand (which was on wheels) and then rolled the stand to the back of the garage. Now the problem was how to get it off the stand, and onto the ground (at which point I would slide it into the basement). I looked at the old block and tackle and thought I might just be able to lift it using that. So I hooked up to a rafter, used some chain to hook it to the compressor, and pulled on the rope. No dice. I was just barely able to lift it a little bit, and then I had no way to move the stand.

I needed something stronger. Fortuantly an idea popped into my head. My car had a tow loop on it, and it could easily pull the 350lbs or so the compressor weighed. So I ran the rope over to the car, tied it off, and backed up a bit. Low and behold it lifted up easily. I put the e-brake on, hopped out, moved the stand out of the way, got back in and lowered the compressor down. It was a cake walk. Sliding the compressor downstairs was a bit more work, but once again taking advantage of the block and tackle it was manageable.
Changing the Basement Layout

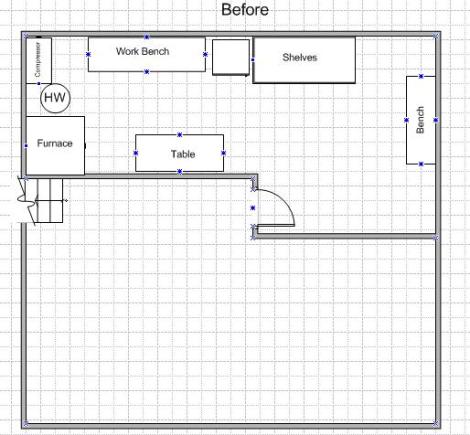
The floor plan of the basement was fairly simple when we moved in. two big rooms divided by a simple wall with a slight jink in it. I only had one problem with it, everytime I wanted to walk to the workbench I would need to go all the way around and back again. Sure its only probaly an extra 20ft to walk, and I could probaly use the exercise, but I didn’t like it. Considering that I frequently forget a tool that I need while I’m working upstairs or outside I spend lots of time running downstairs to get one or two things. Since most of these tools would be hung on the pegboard above the bench, it was an added irritation that I didn’t need. So I decided to rearrange things a bit.

I moved the door from the jink in the wall to right at the base of the stairs. This seems like a much more logical route and it will undoubtedly save me alot of time. Plus cutting the new whole for the door was alot of fun, I got to just take my new reciprocating saw and just cut the outline of a door. I then took what was left and used it to cover up the old doorway. Piece of cake. One problem, the light switch was all the way down by the old door, so I had to move that as well, which was of course far more difficult. I also rearranged the shelves and benches a bit to give myself more room, as well as be able to have a big open area for big projects. The table saw is on wheels so I can move it out of the way or into the center of the room as needed.

Starting the Workshop

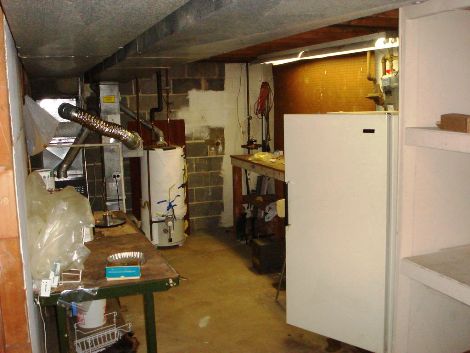
This is what the basement looked like when we moved into our new house. It has an old freezer, some old shelves, a few workbenches, and a whole lot of junk. The previous owners didn’t do a very good job of cleaning out all of the stuff they should have, however it wasn’t worth complaining about it at the closing. The downside is that its a decent bit of work to get rid of all their junk, but on the upside there were a few useful items, like some crowbars, torch, and pipe cutters. My current project is going to be getting this space cleaned up and organized so that I can use it as my workshop. I’ll probably move the door, run some more wires, hang some lights, and put up some more shelves. We’ll see how it goes.