My Pickup Truck

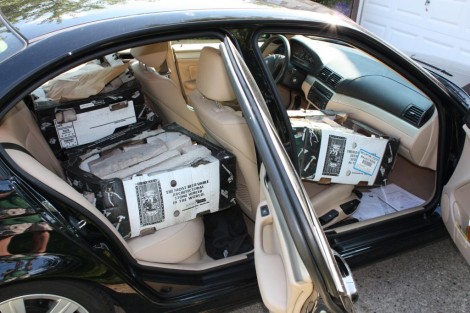
When I bought my car, I was living at home with my parents.  I needed to haul around my friends but not much else.  Thats why at the time a BMW 325i Sedan sounded like a great idea.  It could fit 5 people in reasonable comfort, and was fun to drive.  Heck I didn’t even get the fold down seats because “when was I ever gonna use that”.  Fast forward 5 years and now I really wish I had gotten a full size pickup instead.  Today I had to go pickup the stone veneer that will surround the fireplace.  Since I’d already bummed a ride off my friend to go pickup the five foot long, 250lb stone hearth,  I was stuck getting this myself.  5 Boxes, 80lbs a piece.

At the stone yard, the forklift guy starts laughing at  me, particularly after only one box will fit in the trunk.  I managed to get the rest in the car, and could have even fit a 6th box in the back seat!  Of course the waxy boxes did make a bit of a mess of the interior, but thats cleaned easily enough.
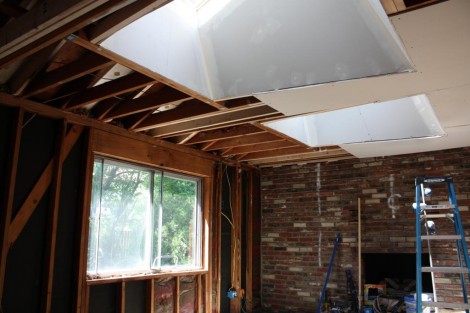
Sheetrock on the Skylights

I’ve begun putting up the sheetrock in the skylight ‘tunnels’.  Cutting all these different pieces was quite the pain.  On most of the pieces there were no 90 degree corners, and out of the four sides, three of them require using more than half of a 4×8 sheet.  Of course I forgot about these tunnels when I bought the sheetrock a few months ago which means that even though I got five or six extra sheets, I’m probably going to run short now.

The tunnels also get extremely hot, since they are sitting right in the attic and the sheetrock traps all the hot air.  This makes me wish we had gotten the venting skylights.   Work will undoubtedly slow down now that I’ve hit the dull sheetrocking stage.  The taping of the seams is not a very fun task so I won’t be as interested in doing it, and therefore it will end up taking forever.

Soffit Vents

When my house was built it seems the designer did not realize the importance of having a well ventilated attic.  As such, the attic over my garage/family room  has only one gable vent.  On the other end of the attic is a wall, and there are no other vents in the roof.   The lack of additional vents renders the single gable vent useless, as there is nowhere for air to come in from.   The lack of ventilation causes two serious problems.  First, the attic becomes extremely hot, as all the energy from the sun beating on the roof has nowhere to go.  This will increase your energy bill in the summer, as the increased temperatures will cause an increase of heat transfered to the conditioned space in the house.  In addition the increassed temperatures will decrease the life of the roofing material.

Secondly, the lack of ventilation will cause a buildup of moisture in the attic, as the humid air leaks into it from the rest of the house.   Moisture buildup is never good, and in the attic it can cause a handful of problems including mold growth on the rafters (which was noticed by our home inspector).

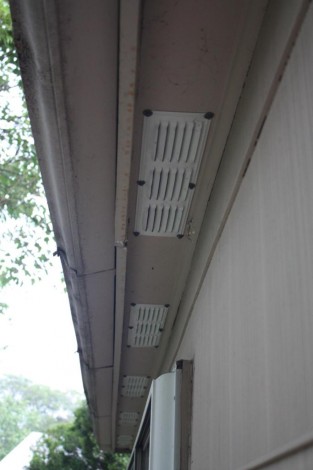
With the attic all open and easily accessable I’ve taken the opportunity to add in some soffit vents.  These vents will allow cool, dry air to flow up into the attic, and go out the gable vent.  This still isn’t ideal though, as the gable vent is only at the one end.  Therefore when we redo the roof, I’ll also be adding a roof vent and that will greatly increase the air flow.  Adding the soffit vents is quite easy, although all of the work is done over your head, which makes it much harder.  All i did though was to cut some square holes with a jig saw and then screw some vent plates over them.

Skylight Tunnel Framing

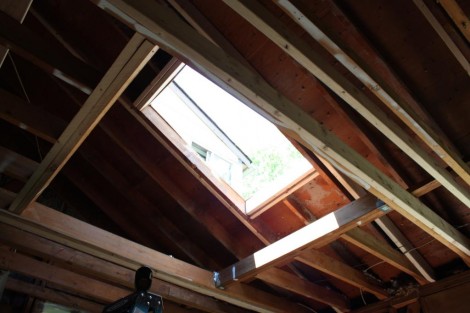
I decided to wait until the skylight was installed to finish framing the ‘tunnel’ through the attic.   The framing is really just there to support the Sheetrock that will be going up.  Since it doesn’t have a real structural purpose, it didn’t matter when I did it, and I wanted to make sure the skylight looked proper before going ahead with the framing.   Doing the framing was more difficult than I was expecting.   I hadn’t realized just how much lumber would be required to adequately support the drywall.  In addition to the sheer number of studs I had to add, a number of them were at complex angles require multiple measurements and tricky cuts.  Fortunately between my compound miter saw, and my circular saw I was able to cut all the pieces quickly and accurately.

Skylight!

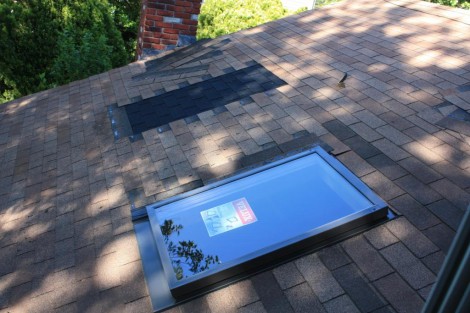
As you can see, one of the skylights has been added, and I’ve started the work for the second one. The ‘Self Flashed’ Velux skylights that we got are very easy to install. Once the shingles are removed from the roof, and the rough opening is cut out and framed up the skylight just drops in.  This is a two person job though, and my friend Marty did an awesome job helping me with it.   Velux includes some nice positioning blocks that allow you to make sure its aligned correctly, and then you just hammer some of the provided nails into the roof. After that you just have to put the shingles back on and thats it.

Alot of our friends and family have expressed concern that the skylights might leak. I, however am not concerned as the Velux skylights have three separate barriers against water. Any one of these should be sufficient to prevent leaks. The first is the metal flashing that gets layered underneath the shingles. This is the main line of defense and I can’t really see any water ever getting passed it. After that though, is a rubber flashing that extends a further 6″ beyond the metal. lastly around the rim of the rough opening a rubber gasket will still prevent leaks even if these other two barriers fail.

Hole in the roof!

Normally a  big hole in the roof would be considered a bad thing, but in this case its in preparation for the fancy new skylights we’re putting in.  I spent the weekend re-framing the opening, adding headers and sistering in some new rafters to support the load after the existing ones were cut.  Having all the right tools made the work pretty easy.  I used my wonderful Dewalt circular saw for most of the cuts, and used my 50-year old table saw to angle a few of the beams.  By far the most useful tool was the pneumatic framing nailer.  I probably could have done it all with a hammer, however I would have been exhausted and it would have taken twice as long.

Stage 1 Complete!

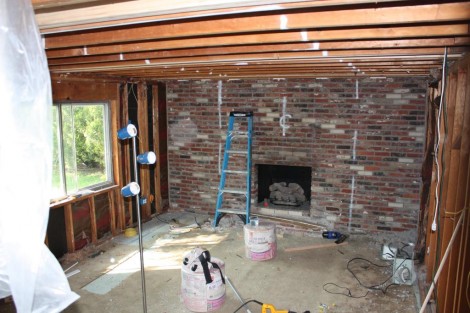
The demolition is finally complete, and the new work can begin.  Actually the new work already began with the electrical work I showed in the previous post.  I’ve also done a bit of framing, adding in some additional rafters to replace the ones that are being taken out.  One of the new ones is visible in the foreground of the picture.  In the picture you can also see some of the layout lines I’ve added to help visualize the final product.  On the brick wall the two white lines show how far out the stone veneer will come,   and on the ceiling the white lines show where the openings for the skylights will go.

As an added comment, this is the first picture taken with my fancy brand spanking new Canon Rebel Xsi.  This Digital SLR camera will replace my tiny little, mostly broken, Sony DSC-T9.  The pictures the Rebel produces are amazing even with my lack of photography skill.   The kit lens that I’m currently using is also much wider than the tiny little lens on the T9.  This means I can get more of the room into the picture without having to stitch together photographs.  At some point I’ll get a super wide angle lens,  but they are quite expensive, so that won’t be for a long time.

Wiring the Family Room

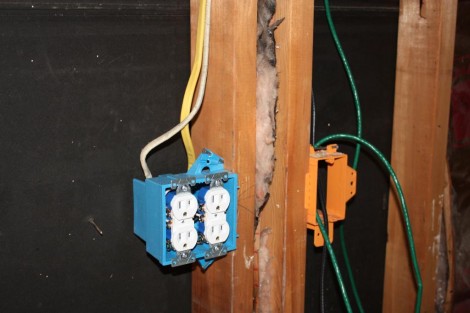
The previous owners of our house had done a bit of remodeling to the family room.  Exactly how much is a bit hard to tell, but by looking at the different types of electrical wire it seems that they added some recessed lighting and a motion sensor outside light.   Both of these have switches in the room, and were installed using remodel electrical boxes.   Remodel boxes are attached to the wallboard (in this case wood paneling) and therefore when I removed the paneling they were no longer supported.   I replaced these with some nice new construction boxes (they get nailed directly to a stud), and while I was at it, I decided to add a few more outlets to the room, including this double set which will be behind the TV.

Since the room will be used as a home theater, in addition to the electrical work I also had to run some other wiring, coax for the TV, a network cable for the Xbox, and some speaker wire for the rear surrounds.  The orange ‘box’ is a low voltage box, that is really just a frame with screw holes for a cover plate.  I suppose the ‘proper’ thing to do would be to terminate all the wires in the box and have nice little jacks to plug everything into, but this seemed unnecessary and would be detrimental to the signal from the antenna, as well as to the speakers.  Instead I just left enough wire hanging out to easily reach the TV stand.

Lumber

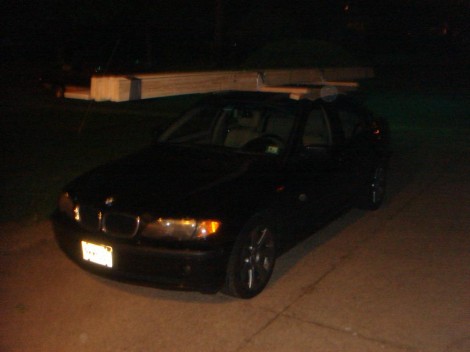
What do you do when the only cars you have are both smallish sedans and you need to get 16 foot pieces of lumber home?  Why you build a roof rack of course!  To reinforce the roof for the upcoming skylights, we needed to get a bunch of 16 foot long 2×6’s.    Would have been nice to just rent a truck to get them, but the truck they have to rent at Lowes only has an 8 foot bed, and no roof rack.    The best option would have been to have them deliver it, however that was rather expensive, and this way seemed more fun.

Building the rack was pretty straight forward.  However I did hit a few bumps along the way.  My car has some nice nut-plates in the roof, which would make bolting down the rack easy and secure.   Since my car is German though, these bolts were metric.  This means that despite the massive collection of screws, nails and bolts I inherited from my grandfather, I didn’t have any that fit.  Fortunately after some hunting I found the proper M6 bolts at Lowes.  I then wrapped some 2×6’s in carpet to protect the roof, bolted them down, and then screwed some 2×4’s down to those.  All in all it worked pretty well, although the curvature of the roof made things a bit difficult, and of course it looked quite ghetto/white trashy.

Tearing down the Ceiling

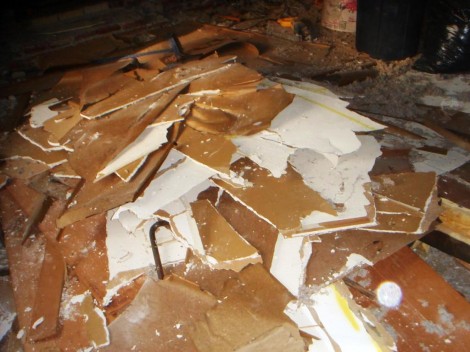
The ceiling in the family room had these fake wooden beams on it, as well as being covered with a rough texture.    To get rid of the texture the two choices are to either skim coat it with plaster, or to just rip it down and start anew.   Since we would have had ot remove a large chunk of the ceiling anyway for the new skylights, it was an eeasy decision to just tear it all down.   It was an easy job, as I was able to go in the attic and hammer down most of the drywall.  However that was just the start of it, as the cleanup would end up being far more work than just knocking it down.  Since we didn’t rent a dumpster I got some nice Glad Force Flex contractor bags.  Which although they were quite expensive (50 cents a piece), they don’t rip when you put 40lbs of drywall into it.  This made the job pretty easy, but it was still a lot more debris than I would have imagined.