Getting ready for the Pre-Slope

floor2.JPG

The floor of a ceramic tile shower is an impressively complex system, with a slew of layers in it.  After putting in the plywood floor, the next step is a tar-paper backer, and then a metal lathe to add strength to the mortar that makes up the pre-slope.  I’ve also stacked three 2×4’s at the entrance to make up the shower dam, which will prevent water from flowing into the rest of the bathroom. 

Plumbing in the Shower Valve

showervalve.JPG

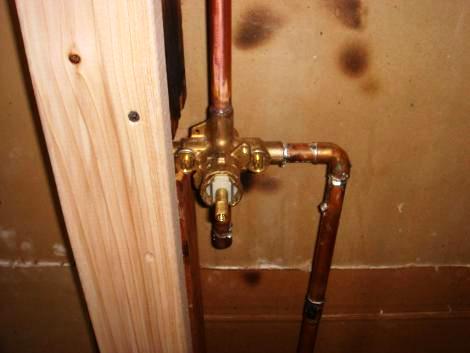
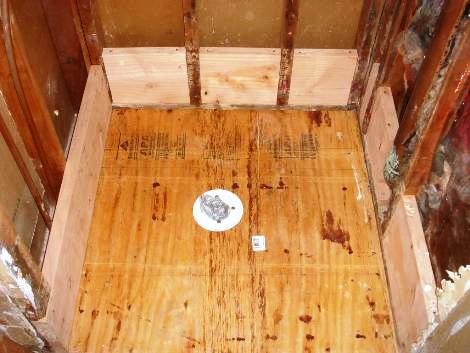
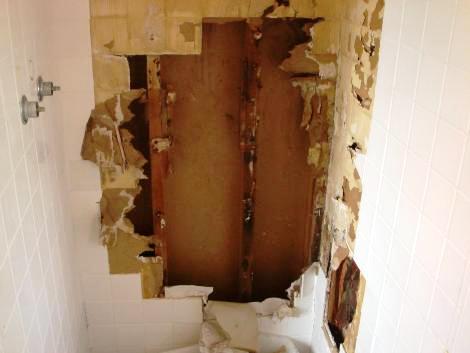
After putting in some lights to see by it was time to do the shower valve.  We’ve ordered some nice Moen Evahardware to use, and while we have to wait a few weeks for the handle and trim to show up, they had the valve in-stock so we could put that in.  Moen has some very fancy ‘Posi-temp’ setups, that allow you to always have the same temperature shower every day.  Of course these setups cost abotu $500, vs ~$150 for the regular single handle setup.  We figured that for that price we’d just get the regular valve, which also means that the installation is easier! 

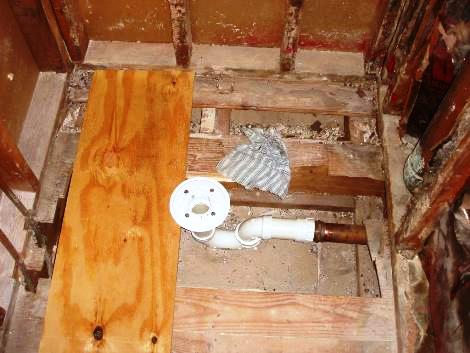
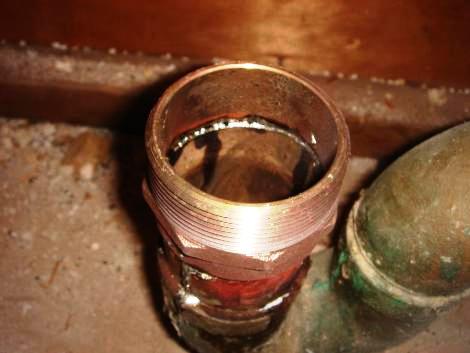
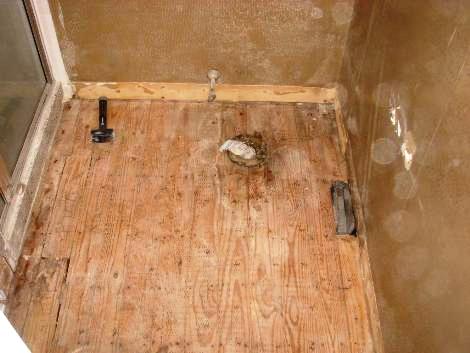
 So after cutting out the old two handle shower valve, I cut up some pipe and soldered in the new valve.  At first I was getting the connections way to hot, and was having trouble getting the solder to wick into the joints, but after realizing my mistake, it went pretty quickly.  As you can see I did get some slight burns on the sheetrock, but nothing significant.   The valve can also be used with a tub setup, which means that in addition to the hot/cold pipes, and shower head, I also needed to put a stub and a cap on the bottom output.  Since I’m continually frustrated by the short showers I encounter,  I was very happy to be able to run the line almost to the ceiling so that I finally wouldn’t have to duck to get my head wet!

Time for a bit of electrical

electircal11.JPG

After putting in the light, the next step was to wire it.   So I broke out my wire cutters, and ran some wire from the existing outlet up to the light fixture.  I then removed the existing box, since it was only big enough for one switch, and put in a 3-wide box.  This will allow us to have the switches for both the vanity lights, and the shower lights, as well as the GFCI outlet all right by the door.  The switches for the fan, and heatlamp will go on the far wall.  These aren’t actually the switches that will be used, I’ve ordered some light-up switches to use instead, to act as a bit of a night-light for those middle of the night bathroom trips.  I also realized that I should rearrange the box, so that the outlet is closest to the stud,  as it is under the most load from plugging and unplugging.

Ceiling

ceiling1.JPG

After putting the floor down I realized I needed some more light to work with, so I put up the Durrock and recessed lighting fixture that will go in the ceiling of the shower.  The fixture is an airtight can, since the other side of the ceiling is the attic, this will prevent any air leaks, and the cover for it is a gasketed, shower specific cover, that will prevent the bulb from getting wet.   The installation actually went pretty easily, once I had the Durock cut to size, I hoisted it up, and with the help of my wife screwed it to the joists.  Then I climbed into the attic and was able to slip the hangers for the light underneath the joists, and adjust them so that the can was centered over the hole.  This was alot easier than putting the light up first, and then trying to get the hole in the Durock to match up.

New Shower Floor

floor1.JPG

With the drain all installed, I layed down a piece of 3/4″ plywood for the new shower floor.  I also added some 2×10 blocking to attach the new shower pan to.  This was the point were I discovered a significant problem.  The copper vent pipe (on the right hand side of the picture) stuck out about 1/4″ beyond the studs.  Since I couldn’t move the vent pipe, this meant that I would have to add some sort of wood strips to the walls to allow the Durorock to lay flat.  This was also the point that I realized I needed a framing hammer, as the little hammer I generally use was not up to the task of nailing in the 2×10’s.  However since I was feeling rather broke at this point, I decided instead to use some galvanized screws instead.

Shower Drain, Part 2

drain2.JPG

While my soldering skills of the drain adapter were spot on, apparently my measuring skills were not.  After fitting the drain, a small piece of PVC, and the threaded adapter to the top of the pipe, the shower drain was way to high.  So I had to unsolder the brass adapter, cut off the copper trap, and replace it with a PVC one.   The upside of this is that I get a nice fresh clean trap to work with, the downside is that there are now many more potential spots for leaks.

New Shower Drain

drain1.JPG

Once I finished the demolition I started with the rebuilding.  The first step was to get the shower ready for tile.  This meant patching in a 3-piece PVC drain onto an exisiting copper drain pipe.  To do this, I cut off the old drain, and soldered on a threaded adapter to attach to the PVC.  This was my first shot at soldering pipe, and I’m pretty happy with how it turned out.

Shower Floor

demo7.JPG

 This is the last step of the demolish, removing the floor of the shower.   This was obviously not the original floor, but its hard to tell just what was new and what was original.  The floor itself is made of a solid 2  inches of concrete, which I think was precast.  It was quite sturdy, but after a bunch of whacks with the sledge it cracked into pieces.  Unfortunately this was the easy part.  The floor had a few pieces of re-bar through out it, as well as some metal on the edges.  I’m not sure if the metal on the edge was meant as a shower pan, or was leftover from the original installation.  Whatever it was for, it had mostly rusted away.  What hadn’t rusted away however was intact enough to make removal quite difficult as it held the large chunks of concrete together.  At this point I had already generate a few hundred pounds of debris, and was not looking forward to getting the garbage men to pick up a hundred pounds of concrete.

Shower destruction

demo6.JPG

With the rest of the bathroom done it was time to tackle the shower.  The tiles in the shower were layed on bare sheetrock, a big no-no in a wet area.   On the upside this made tearing it out much easier.  The sheetrock was quite damp, and using a crowbar, the tiles easily fell away from it.  I was a bit scared to see what I would find behind the walls of the shower as I had dreams of giant piles of mold and fungus growing back there.   I was happily suprised to see that it wasn’t bad at all.   There were a few spots with some mildew on them, but other than thtat it was fine.

Floors done!

demo5.JPG

I removed the toilet, as well as the heating vent, and finished removing all of the floor tile.  Removing the toilet was quite easy, although some water did get on the floor.  I also managed to crack the base of the tile trying to get the corroded bolts out.  Fortunately I was not planning on reusing the toilet, but I would suggest that if you are you should be very careful, as it cracked quite easily.  I was very happy to find that the mortar came off the floor cleanly, as I was not looking forward to having to replace the sub-floor.  You may notice that there are some gaps in the floor on the left side of the picture.   I had originally thought the they just did a crappy job laying the floor, but it turns out that these were conveniently labeled “Pipes” and were easily removed to check the piping beneath.