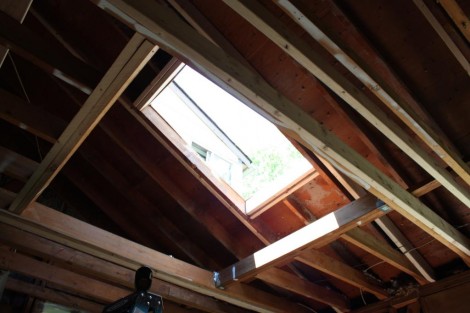
Hole in the roof!

Normally a  big hole in the roof would be considered a bad thing, but in this case its in preparation for the fancy new skylights we’re putting in.  I spent the weekend re-framing the opening, adding headers and sistering in some new rafters to support the load after the existing ones were cut.  Having all the right tools made the work pretty easy.  I used my wonderful Dewalt circular saw for most of the cuts, and used my 50-year old table saw to angle a few of the beams.  By far the most useful tool was the pneumatic framing nailer.  I probably could have done it all with a hammer, however I would have been exhausted and it would have taken twice as long.

Stage 1 Complete!

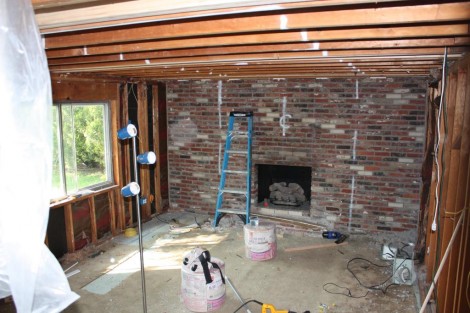
The demolition is finally complete, and the new work can begin.  Actually the new work already began with the electrical work I showed in the previous post.  I’ve also done a bit of framing, adding in some additional rafters to replace the ones that are being taken out.  One of the new ones is visible in the foreground of the picture.  In the picture you can also see some of the layout lines I’ve added to help visualize the final product.  On the brick wall the two white lines show how far out the stone veneer will come,   and on the ceiling the white lines show where the openings for the skylights will go.

As an added comment, this is the first picture taken with my fancy brand spanking new Canon Rebel Xsi.  This Digital SLR camera will replace my tiny little, mostly broken, Sony DSC-T9.  The pictures the Rebel produces are amazing even with my lack of photography skill.   The kit lens that I’m currently using is also much wider than the tiny little lens on the T9.  This means I can get more of the room into the picture without having to stitch together photographs.  At some point I’ll get a super wide angle lens,  but they are quite expensive, so that won’t be for a long time.