Staining Window Trim

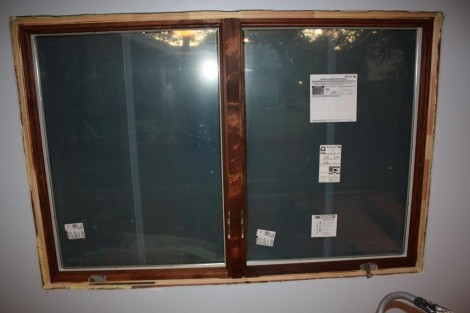
In the past I’ve always painted the trim in the other rooms of the house.  However for this room the wife decided that she wanted the trim to be all stained.   We picked out a nice dark walnut colored stain and proceeded to order all of our windows and skylights in unfinished pine.  I’ve stained pine in the past, and generaly have had good results, although it can get a bit blotchy.  I know you can use a wood conditioner overwash, however that also makes the end result be lighter, and we wanted it to look nice and dark.  All of the other molding we stained turned out acceptably, and the skylights turned out beautifully.  The Andersen window we got was quite the disappointment though.  The main rail looks terrible, and the bottom rails are quite different shades.  I suspect this comes down to the poor qualitly of wood used by Andersen in the construction of the window.    The good news however is that the center rail is acutaly just a trim piece tacked on with a few brads.  That meant that I was able to pop it off, and I can replace it with a higher qualitly piece of wood that should look great.

Fixing my car

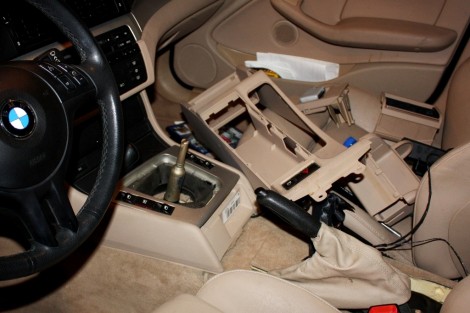
The family room is the second big house project I’ve undertaken, and I’ve realized that when I get going on a big project I tend to neglect the other little things that go wrong with other parts of my life.  For instance my car has developed a few minor problems, that I’ve put off until finishing the family room.   Well finally a big enough one came along that I had to take care of it.  The window regulator on the driver side door broke, meaning that the window wouldn’t go up or down.  Which of course was a problem since it was currently down. Happily, its quite easy to fix, with the new part being about $100.  While I was at it, I decided to replace the very worn and cracked shift boot, as well as the center arm rest.  All the work I’ve done on my car has been quite easy to do, thanks to the excellent design of my 325i.  As such after a couple of hours I had everything swapped out and looking good.  I didn’t need to run and get any special tools, or spend hours trying to get a rusted bolt off, which seemed like the norm any time I remember watching my dad to work on our cars.

Family Room Window

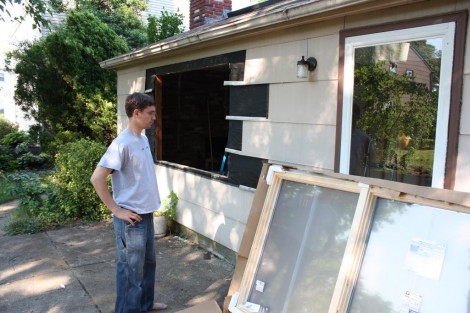
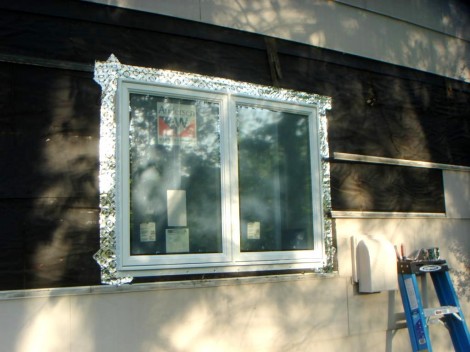
Since I’m starting to have a multitude of window installation posts, I’ll keep this one short.  Installing the window was straightforward, it fit well, so it was jsut a matter of removing the shingles, and the old window.  The new one was then lifted into place, shimmed to be square and level, and nailed in.   Despite these being Anderson windows I used some Pella Smartflash tape to seal the flange.  I’ve had good experiences with this tape before, and its available at Lowes.  The windows are Anderson 400 series casement windows.  The insides are unfinished pine, so that we can stain them to match the rest of the trim.  The casement windows will allow for more ventilation than a traditional double hung.  A benefit as this is the only window in the room.

New Kitchen Window

For the family room project we decided to replace the window, as well as add in the skylights.   Since we have two other windows in the house that are the same size as the one in the family room, we decided to go ahead and get those too.  And of course since that meant we were replacing one of the windows in the kitchen we figured we might as well replace the other one too.  Gotta have them all match you know.  Of course this had the effect of lopping another couple thousand dollars onto the cost of our family room, but thats life.

We decided to get Anderson windows this time, the decision was slightly arbitrary.  The windows seemed pretty much the same, I liked the interior finish on the Anderson better, but I liked the aluminum cladding on the Pella better.   Although I must say the $40 ‘Fuel surcharge’ that Pella wanted pissed me off.  If your delivery costs go up, raise the price of your delivery, don’t add on an extra fee and pretend its not your fault.  /rant

I did run into a bit of an issue with the installation, the window we got was the exact size of the rough opening, which meant there was no room for any shims.   The opening was pretty level and square so it shouldn’t be too big a problem.  If it is I’m going to have the walls all open in a few years when we redo the kitchen anyway so I can re-frame it then.