Insulation, the final chapter

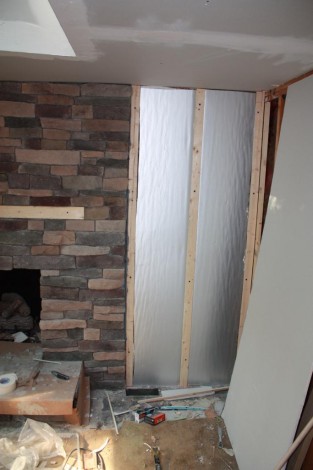
In an effort to make the family room as cozy as possible, I’ve used some Great Stuff expanding foam to seal the walls, some fiberglass bats to insulate the walls, a giant pile of cellulose to insulate the ceiling, and some rolls of fiberglass to insulate the skylights. This is the last part of the insulation, and also probaly the most worthless, but I’m doing it anyway. After bolting some wooden furring strips to the brick wall to hang some drywall to, I noticed that there would be a 3/4″ gap in between the drywall and the brick, a perfect spot for some more insulation! This time I’ve used foam board insulation, which has a nice foil backing to help reflect the heat into the room. The foam only adds a few to the R-value, and considering the brick (which is an excellent insulator by itself) is in front of a insulated 2×4 wall, this was undoubtedly overkill, however it was only a few bucks to put in, and it was easy to do.

Insulating the Wall

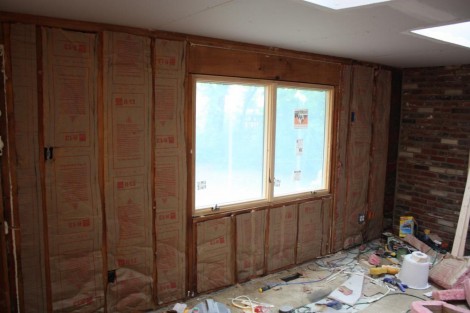
The next step in making the family room nice and warm after I’ve sealed any potential air gaps is to install fiberglass bat insulation into the wall cavities.  This is quite simple, the insulation comes in a nice roll and cuts very easily with a sharp knife (the sharp part is key as a dull knife will tend to tear instead of cutting it).   Owens Corning seems to have vastly improved the Pink Panther insulation, as I had no issues putting it up without wearing gloves, even with my soft “spends all day sitting in front of a computer” hands.  This is certainly not the case with the old stuff that I pulled out, as just looking at it makes me itch.

I’m actually not finished with this part yet, I still need to unfold the kraft paper flaps that cover the studs and staple them up.  This should further help prevent air infiltration, as well as prevent the insulation from sagging overtime.  I just need to throughly check the studs for any leftover nails from the wood paneling before I do that.

It’s Greeaaatttt!

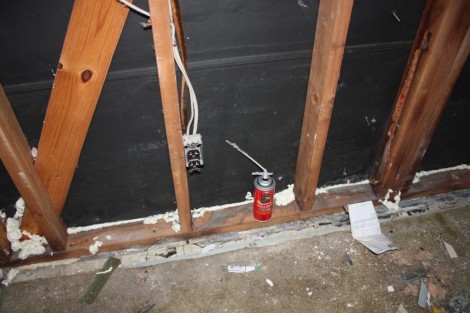
When used properly Great Stuff expanding foam is an awesome substance.  it sticks to pretty much anything, expands into gaps, and is water-proof.  Its designed to be used to insulate in little gaps and cracks that are two small for regular types of insulation.   Although it probably has a decent R-Value, its far to expensive to be used in any significant thickness, and is much more useful at preventing air leaks.   I used it on this outside wall to make sure that all the gaps along the bottom of the sill plate were plugged (some bugs had previously found that they weren’t)  as well as to seal around the sheathing where holes were cut for lights.  Ohh and if you’ve ever gotten this on yourself,  a little acetone before it dries takes it right off.  Just don’t let it dry because once it does its practically impossible to remove.

Insulating the Skylights

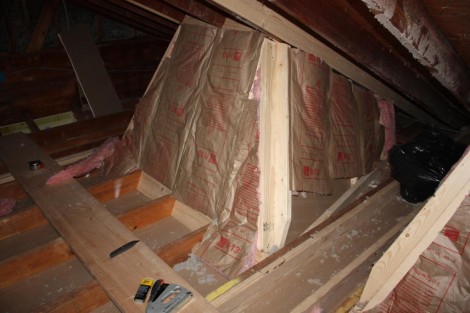
The old attic was just a nice flat roof that originally had some blown in fiberglass in it.  At some point the previous owner had added some fiberglass rolls on top of that, and then this past fall in a poorly timed project I blew in another 12″ of cellulose.   After taking that all out and redoing the ceiling, its now time to put some insulation back in.  I’ve saved all the blown in stuff,  but that won’t work for the nearly vertical sides of the skylights. For those I’ve used a base of R13 Fiberglass, running in between the framing.   This required alot of cutting as few of the studs are 16″ apart, and parallel.  I also realized too late that I should have done the far end before putting up the sheetrock, as its almost impossible to get in there now.   With this insulation in, I’ll use my air compressor to blow the rest of the insulation back in, as well as a wrap the skylight ‘tunnels’ with a roll of R30 fiberglass.  This should give me R43 on the vertical surfaces, and R50 or so on the horizontal.