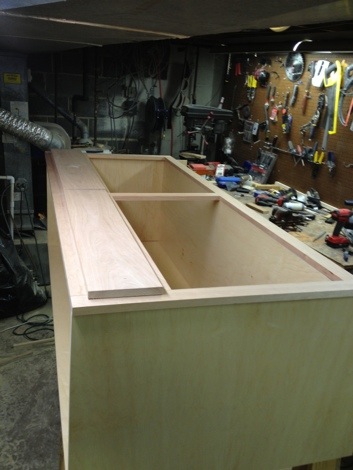
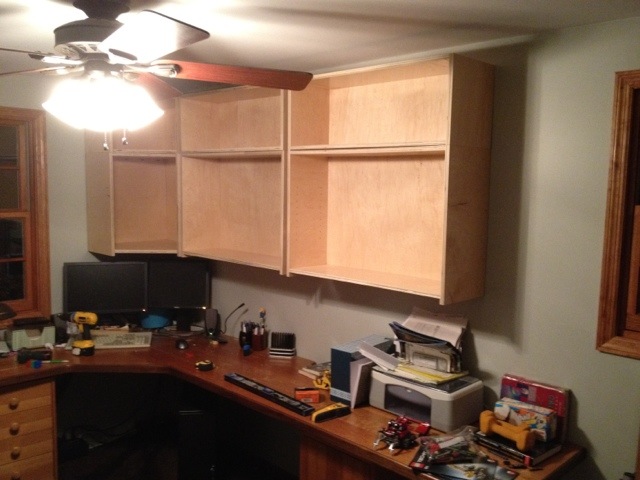
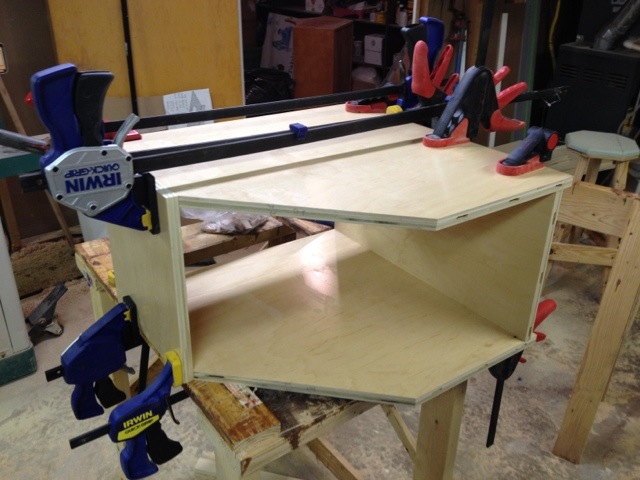
Voidsmith.com

A house remodel journal

New Patio Light!

Jess wanted to replace the dingy old patio light with a nice new one.  Normally when a guy says his wife wants to replace something, that generally means that they want him to do it.  Not this time for Jess though, she wanted to do it herself.  She did a great job, I gave her a hand holding it, and taking her picture, but that was it.  The new light works great, and looks much nicer.  Now if someone would just paint those gutters…

Leaky Kitchen Sink

The other day Jess  calls me into the kitchen and points out the puddle of water she noticed underneath the sink.  It looked like it had been there for awhile, and was hidden behind some bottles and such.  After a bit of routing around I was able to find that the slip nut that connects the trap to the drain had cracked, and water was leaking from there.  These chromed brass traps come in various quality levels, with the cheapest 22 gauge ones not being much thicker than paper, so its not surprising that it broke.  Once I’d figured out what the problem was, it was easy enough to run to Lowes and get a replacement (the nice thick 17 gauge one), and solder it back in.  Not a big deal, but its irritating that I had to spend my night doing this because the previous guy was to cheap to spend the extra 5 bucks on the higher quality one.

Expanding the Workshop

This is my workshop.  Notice in the foreground is my table saw on the left and sawhorse and stand on the right.  Notice how the wall protrudes into the workshop?

Here’s another picture from the other side.  See all that space behind the pole?  Between the pole and the beam, that’s all wasted space over here, and it would all be very useful on the other side.  So I decided I would just move the wall so it lined up with the other section.  Piece of cake right?  A partition wall is just a couple of 2 x 4’s with some Sheetrock.  It’s not even load bearing.  Well… turns out its a bit trickier than I thought, hit the jump to see how it turns out.

Read more

Grass!

germinating

It’s been just over a week since we put the grass seed down, and its just beginning to sprout. The sprinkler system has been doing a great job keeping the ground moist, and with lots of sun, and warm weather, the grass came up super fast. It’s looking like I probably missed a few spots, so I’ll have to fill in those in the spring. I also see a more severe problem, the uneven settling. I didn’t have a lawn roller to compact the rototilled soil and compost, so I just tried to level it as best as I could, however it seems that since some spots were more compact than others, its turning out to be rather lumpy. I’m not sure what to do about this, but I’m going to leave it till the spring to deal with.

Helpful wife

jessraking
Those 8 cubic yards of compost don’t spread themselves, so I was glad to have the help of my wife. She did a great job spreading it all out and getting nice and even to make a happily little home for all of the new seedlings. After the compost was down, I spread some lime and fertilizer into it, and then raked it all in to even it out.

Sprinkler Valves

valvebox

You can actually just bury the sprinkler control valves in the dirt, but that makes repair difficult, so its common practice to stick them in a box like this. I hooked up my four valves with some solid PVC pipe, and ran all the piping from the sprinkler heads into the box. I used an old piece of downspout to cover the incoming pipes, so that i don’t accidentally cut them while digging in the garden. The controller for the valves will be mounted in the garage, not to far away.

Trenching

trenching
The pipes for the sprinkler system must be buried of course, and therefore trenches need to be dug to run them in. I could have rented a trench digger, but it wouldn’t fit in my BMW, and besides I only had a few hundred feet to do. So I bought a trenching shovel from Lowes, and went at it by hand. Doesn’t take to long to do, but it is mind numbing work.

Running a Pipe Under the Driveway

pipe-underdriveway

Getting the sprinkler pipe under the driveway turned out to be the most difficult task of the whole project. I came up with the idea to use a water jet nozzle on the end of a long length of pvc pipe to blast a tunnel under the driveway. I’d used this before going under a sidewalk, and thought it would work well under the driveway. Things started off well, with the pipe slowly going in, and digging a nice tunnel. However after about 6′ the pipe got stuck. I couldn’t get it to go any farther in, and even worse I couldn’t pull it back out either.
I tried to use my pressure wash to dig it out, but that didn’t work, so the only thing I could think of was to try again. I hooked up another pipe to the hose, and started digging in. I got to about 6′ without problem, but was unable to free the other pipe. So of course I just kept going. I got to about 8′ when low and behold the pipe got stuck. I was now out of pipe, and out of ideas, so I left it be for a few hours.
In my pondering I thing I figured out what happened, and that is, the sand that our concrete driveway is poured on, makes for a poor tunnel, and although the pipe had no problem digging through it, the tunnel would then collapse on the pipe, getting it firmly stuck. So I bought another section of pipe, and this time tried to go right underneath the concrete instead of about 6″ below it. This finally worked without a problem, and I was able to get the pipe all the way through.
Of course the other two pipes are still stuck there, and will remain that way until the end of time.

Compost!

compost
Every year the town comes and hauls away all our fallen tree leaves. Well now after they’ve been sitting for a year, they’ve brought them all back! This is what 8 cu Yards of compost looks like, which is nicely delivered from McNaughton’s Garden Center for the low low price of $250. This should be enough compost to cover the whole lawn 1/2-3/4″ thick, and should provide a great bed for the happy little grass seedlings. Spreading it out will be the hard part.

Roto-Tilling

roto-tilling

To prep the soil for the new grass I rented a rototiller and went to town. The rototiller was a big rear-tine job that was about $50 for a half day to rent. I was figuring it would chew up the lawn down to about 8″ and break up all the old dead grass, burying it in the dirt. No such luck. First off it only goes down about 3 or 4″ and it misses the section right in the middle. If you’re good at it I’m sure you can jsut make overlapping passes and cover the whole area very well, but I’m not good at it. Therefore in the best places it went 3″ deep, but there were significant sections where I didn’t do anything. Even in the spots that it did well with it didn’t really break up the old grass, and so there were tufts of it everywhere, causing big lumps.
Running the tiller was also exhausting work, and even though it only took two hours, I was beat by the end of it. What I should have done was to then use a garden rake and hand tiller to get rid of the clumps and break up the spots I missed. I did get rid of a bunch of the clumps, but not all of them, and this turned out to be a big mistake.

Next Page »